
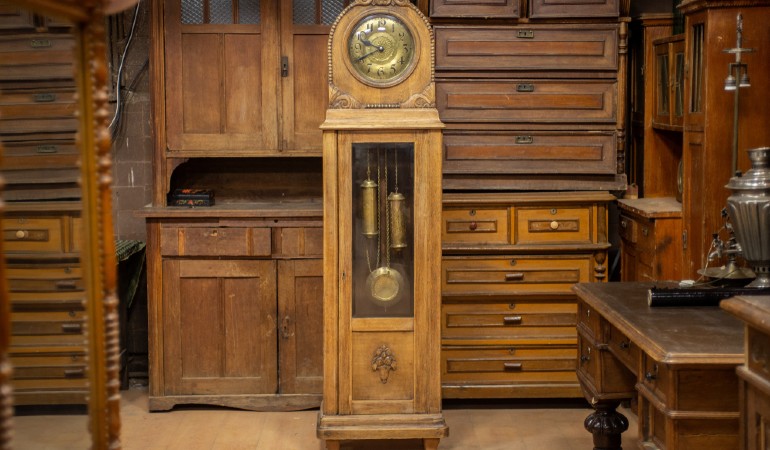
A grandfather clock isn’t just furniture. It’s a living piece of history that ticks away in the corner of your room, connecting generations. Moving one is a different beast entirely from shifting a sofa or boxing up your bookshelf. Get it wrong, and you’re not just looking at a scratch. You could be dealing with a cracked movement, a broken pendulum rod, or a clock that simply refuses to run again.
Moving a grandfather clock takes patience, preparation, and a genuine respect for what you’re handling. Whether it’s been in the family for decades or you’ve just inherited it, this guide gives you the full picture. Not the watered-down version. The real one.
TL;DR
- Always disassemble the pendulum, weights, and movement before moving a grandfather clock.
- Pack each component separately and label everything clearly for easy reassembly.
- Use padded wrapping and rigid boxes to protect delicate glass panels and mechanical parts.
- Transport the clock upright and secured to prevent internal damage to the movement.
- Reassemble on a level surface and check alignment before setting the clock running.
- Skipping preparation steps risks permanent damage to the movement and the clock’s finish.
Table of Contents
How Do You Move a Grandfather Clock Safely?
To move a grandfather clock safely, you need to disassemble it before it goes anywhere. Remove the pendulum, the weights, and any loose internal components first. Wrap each part individually, pack them in separate boxes, and only then move the case. Never move a grandfather clock with the pendulum or weights still inside.
This is the part people skip because they think it’ll be fine. It won’t. The pendulum swings freely inside the case. If it’s left in place during transit, it will bang against the walls of the case repeatedly. That can damage the seat board, knock the movement out of beat, or crack the pendulum rod itself. The weights are even worse: they’re heavy, and if the clock tilts or jolts, those weights become battering rams.
Here’s the process in plain terms:
- Open the clock’s trunk door and carefully lift out the pendulum from its hanging point.
- Unhook each weight one at a time, noting which hook each came from (left, centre, right).
- Wind the clock down fully so there’s no tension left in the mechanism before touching anything else.
- Remove any chime rods or loose components from the movement compartment if accessible.
- Secure the movement’s click springs if you can access them, to prevent the barrels spinning freely.
- Wrap the pendulum, weights, and any removable finials in soft padding and box them separately.
Label every part. It sounds obvious, but in the stress of a move, you’d be amazed how quickly you forget which weight came from which position. On a three-train clock especially, getting the weights back in the wrong position will cause the mechanism to run incorrectly.
Preparing the Clock for Transport
Once you’ve removed the internal components, attention turns to the case itself. This is where the clock’s finish and structural integrity are most at risk. Most longcase clocks have glass panels, either on the trunk door or the bonnet, and these need special care.
If the glass panels are removable, take them out. Wrap each one in several layers of bubble wrap, then sandwich them between two pieces of stiff cardboard before placing them in a flat box. If the glass is fixed in place, pad it generously on the inside of the door so it can’t vibrate against its frame during transit.
For the case itself, here’s what works well:
- Wrap the entire case in moving blankets or thick furniture pads, secured with packing tape (not touching the wood finish directly).
- Pay extra attention to the bonnet, which is the top section of the clock. It’s often the most ornate and the most fragile part of the structure.
- If the bonnet is removable, take it off and transport it separately in a padded box.
- Tape the trunk door shut so it can’t swing open during transport, but use a strip of foam between the tape and the wood to protect the finish.
- Place small components like screws and finials in clearly labelled zip-lock bags and keep them with the relevant part.
One thing people consistently overlook: small parts. A tiny screw or a finial cap seems insignificant, but losing one means a hunt through specialist clock suppliers to find a match. Keep a dedicated bag for every small piece and tape it to the component it belongs to.
Check also:
What’s the Best Way to Transport a Grandfather Clock?
A grandfather clock should always travel upright. Lay it on its back and you risk the movement, which is mounted to the seat board, shifting or sustaining damage from its own weight. The clock should be secured with straps to the side wall of the vehicle, padded so it can’t rock, and positioned where it won’t be struck by other items.
It’s also worth knowing roughly what you’re dealing with in terms of weight. A typical longcase clock weighs anywhere from 45kg to well over 100kg depending on its age, size, and how substantial the case is. That’s before you factor in the weights and the movement. Two people are the absolute minimum for moving the case. Three is safer for anything taller or older.
For a local move, a large van with a high roof will usually do the job provided the clock is properly padded and strapped. For a longer journey, especially with an antique or a valuable clock, a climate-controlled vehicle is worth considering. Wood expands and contracts with temperature changes. A clock left in a cold, damp van overnight is a clock that may arrive slightly warped or with a movement that’s been compromised by condensation.
If you’re moving an antique longcase clock that’s been valued or insured, it’s worth speaking to a specialist removal service. A removals team handles the full logistics of moving your belongings safely from one property to another, including oversized and fragile items that require specialist securing and vehicle space.
Once you arrive at the destination, don’t rush the unloading. The clock should come off the van last if possible, so it’s not sitting exposed while other items are carried in.
Need help moving your grandfather clock safely?
Let's Get in TouchFor questions about the services we offer visit our main site or you can always call us at 020 3746 0584
Reassembling and Setting Up the Clock in Its New Location
Reassemble your grandfather clock step by step to restore its function and ensure it runs accurately in its new location.
Position the case on a level surface
Before anything goes back inside, check that the floor is level where you plan to place the clock. Use a spirit level across the base. Grandfather clocks need to be perfectly level or the pendulum won’t swing evenly, which throws the timekeeping off. Adjust using thin shims under the base if needed.
Reinstall the movement and seat board
If the movement or seat board was removed, refit these first before anything else goes back in. Make sure all fixing points are properly aligned. A movement that’s not sitting square on the seat board will cause the clock to run erratically or not at all.
Hang the weights in the correct positions
Refer to your labels from the disassembly stage. Each weight must go back on its original hook. On three-train clocks, the weights control separate functions: timekeeping, striking, and chiming. Getting them in the wrong order will cause the clock to chime incorrectly or not at all.
Rehang the pendulum
Gently hook the pendulum back onto the suspension spring. Lower it carefully until it hangs freely. Give it a gentle swing to one side to start the beat. You should hear an even tick-tock rhythm. If the beat sounds uneven, the clock needs adjusting with the beat adjustment mechanism, usually a small lever near the escapement.
Check alignment and set the time
Close all panels and doors, then set the time by moving the minute hand clockwise only. Never move it anticlockwise. Allow the clock to chime at each quarter hour as you advance the hands. Once at the correct time, leave the clock running for 24 hours before making any fine adjustments to the regulation.
One practical note on placement: keep the clock away from direct sunlight, radiators, and exterior walls where temperature fluctuates significantly. These environments dry out the wood and affect the lubricating oils in the movement. A stable, interior wall position is almost always the right choice.
Check also:
Common Mistakes and How to Avoid Them
Most damage that happens during a clock move is avoidable. These are the mistakes that keep clockmakers in business.
Moving the clock with components still inside
This is the big one. Even a short move across the room with the pendulum still hanging can knock the suspension spring off its pin or put the movement out of beat. The weights make things worse. They add instability and can swing into the movement if the clock tilts. Always remove everything first. No exceptions.
Not labelling the weights
If your clock has three weights and you put them back in the wrong order, the clock won’t run correctly. The chiming train and the striking train use different weights from the going train. It seems like a minor thing until you’ve spent an hour trying to figure out why your clock chimes on the hour instead of the quarter, or stops completely after a day.
Laying the clock on its side
Some people assume a horizontal position is safer for a tall clock in a van. It isn’t. The movement can shift, the pivot holes in the plates can be stressed by the weight of the barrels, and oil migrates away from where it needs to be. Always transport upright, always.
Rushing the reassembly
After a long moving day, nobody wants to spend another hour carefully putting a clock back together. But rushing this part causes the most lasting damage. A movement that’s been reinstalled slightly skewed, or a pendulum rehung on the wrong point, can wear the pivot holes unevenly over time. What looks fine on day one becomes a costly repair job months later.
Ignoring environmental factors
Placing a clock against a cold exterior wall, near a draughty window, or next to a radiator is asking for trouble. The wood will move with the temperature and humidity changes, which affects the case joints and, over time, the fit of the movement within the case. Pick a position that’s sheltered, stable, and away from direct heat sources before you even think about starting the clock up.
Check also:
Frequently Asked Questions
What type of wrapping materials are safest for clocks?
Soft moving blankets are best for the case. Bubble wrap works well for the pendulum, weights, and glass panels. Avoid using newspaper directly against any wooden or polished surface, as the ink can transfer. For very valuable antique cases, acid-free tissue paper as a first layer under the bubble wrap gives additional protection to the finish.
How long does it take to fully move a grandfather clock?
Allow at least an hour for disassembly and packing, not counting the actual transit time. Reassembly at the other end takes a similar amount of time if done carefully. Then add a settling period of 24–48 hours before making fine adjustments to the timekeeping. Trying to compress this into a rushed afternoon is the most common reason clocks end up needing professional attention after a move.
Is it necessary to calibrate the clock after moving?
Yes, in most cases. Even a clock that’s running after being set up in its new location should be monitored for a few days. If it’s gaining or losing time consistently, the pendulum bob needs adjusting: lower it to slow the clock, raise it to speed it up. A clock that’s been moved may also need its beat adjusted if it sounds uneven after being set up.
What should I do if my clock stops working after a move?
First, check that the clock is level and the pendulum is swinging evenly. Then verify the weights are on the correct hooks. If the beat sounds uneven, use the beat adjustment lever near the escapement to correct it. If the clock still won’t run after these checks, don’t force anything. Contact a qualified clockmaker rather than attempting to adjust the movement yourself, as incorrect intervention can cause further damage.
Plan your grandfather clock move with care, get started today.
Enter your postcode to view our rates and availability in your area.
For questions about the services we offer visit our main site or you can always call us at 020 3746 0584
Conclusion
Moving a grandfather clock is one of those tasks that rewards patience and punishes impatience. Take the time to disassemble it properly, pack each part with care, transport it upright, and reassemble it without rushing. Do that, and the clock will tick on in its new home just as reliably as it did in the old one.
If you’re dealing with a particularly old, fragile, or valuable piece, there’s no shame in getting professional help. Some things are worth the extra care. A clock that’s survived a century deserves to survive your move too.