Knowing how to pack glasses for moving is half the battle when it comes to protecting your kitchen. Glassware and dishes are the most breakable things you own, and a single poorly packed box can cost you a full set of stemware or a plate you can’t replace. If you do it properly, you won’t spend your first night in the new place sweeping up the pieces.
This thorough guide explains how to take care of the different types of dishes and glasses by packing them with great care and with the proper materials for the job. Your ceramic plates, stemware, mugs and glasses will be well protected if you follow the professional packing tips below:
TL;DR
- Wrap every glass individually in packing paper before placing it in a box, never pack glasses loose.
- Place glasses upright or on their sides in a cell-divided box, never flat and never stacked without padding between them.
- Use cell dividers in any glass box to stop glasses touching each other in transit.
- For wine glasses, wrap the stem first in bubble wrap, then stuff the bowl lightly with paper, then wrap the whole glass in a second layer of paper.
- Never exceed 20 kg per moving box, glass is heavy and overloaded boxes fail at the bottom.
- Label every side of a glass or dish box as “Fragile” and “This Way Up.”
- A dish barrel (approximately 5.6 cu ft capacity) is the single most efficient container for a full kitchen move.
Table of Contents
How to pack glasses for moving
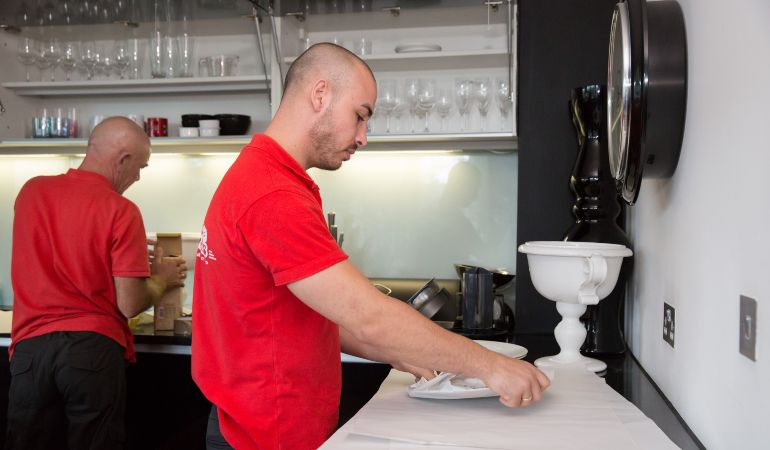
To pack glasses for moving, inspect each piece for existing cracks, wrap each glass individually in packing paper, place them upright or on their sides in a cell-divided box, fill all gaps with crumpled paper, and seal and label the box as fragile. Never pack glasses flat or stacked without padding between them.
- Start with an inspection.
Lay all the glasses you want to pack on a flat surface. Go through each one individually and check for any cracks or chips. Set aside anything that looks damaged, a weakened glass is far more likely to shatter inside the box and cause problems for everything else packed with it. - Sort valuable items separately.
Anything expensive or irreplaceable should go into its own dedicated moving box. The rest of your glassware can share a box, provided it’s properly divided. If you have pieces you really can’t afford to lose, consider transporting them in your own vehicle rather than the moving van. - Wrap each glass individually on a flat surface.
Work on a table or solid worktop. Wrap each glass in packing paper, starting at one corner of the sheet and rolling the glass diagonally until it’s fully covered. Tuck the ends in and secure with tape if needed. - Place the wrapped glasses in a cell-divided box.
Each glass goes into its own cell. Place them upright where the box height allows, or on their sides if they’re too tall. The key is that no glass touches another directly. - Fill every gap with crumpled packing paper.
There should be no free movement inside the box at all. If you can hear anything shift when you gently shake it, add more paper before sealing. - Seal the box with duct tape and finish the top layer with bubble wrap before closing.
- Label each box as “Fragile” on every side.
Read more Tips on Labelling Moving Boxes Like a Pro
How to pack glasses with newspaper
Newspaper works as a filler and a secondary wrap, but keep one thing in mind: newsprint ink will transfer directly onto unprotected glass. Always wrap each glass in clean white packing paper first, then use the newspaper as a crumpled filler around the outside.
- Use the newspaper as a filler around the already packed glasses.
The ink of the newspaper will leave marks on the glasses if they have not been packed with clean white paper at the start. - Do not fold the newspaper, crumple it into a loose ball.
Crumpled paper absorbs shock far better than flat sheets. Use it to fill the gaps between cells and along the walls of the box. - Don’t spend money on newspaper.
If you can’t find any, ask a friend or neighbour for old copies they’ve already read. - Mind that the newspaper will leave ink on your fingers.
Try not to handle the glasses once you’ve been working with the paper. - Recycle the paper when you’re done.
Try to reduce the amount of waste you generate during the move.
Why glass breaks easily
Glass cannot deform before it breaks. Unlike metal, it has no give, so even a relatively minor impact can cause it to shatter without warning. This is why consistent padding and individual wrapping matter so much: there is no visible sign that a glass is about to fail.
How to pack wine glasses for moving
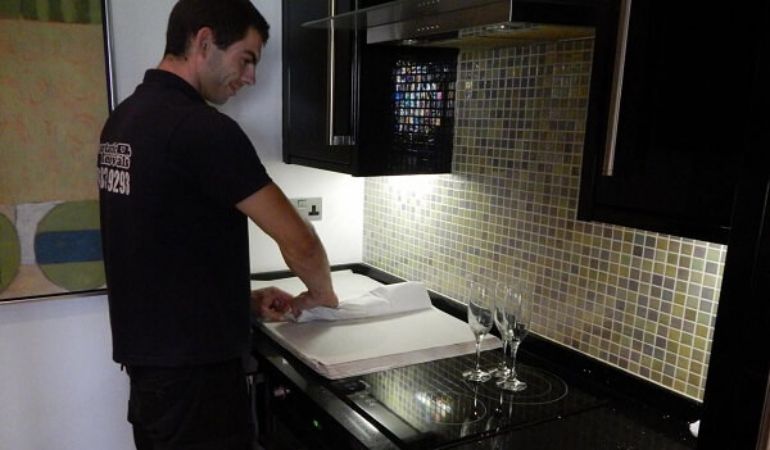
Wine glasses are the most fragile stemware you’ll move. Wrap the stem first in bubble wrap, stuff the bowl lightly with packing paper, wrap the whole glass in a second layer of paper, and place each one in its own cell of a divided box, stem down. Never pack wine glasses without a cell divider.
Wine glasses with long stems are especially prone to breaking. Make a designated box just for stemware, don’t mix them with heavier glassware. Follow these steps to get them to your new home in one piece:
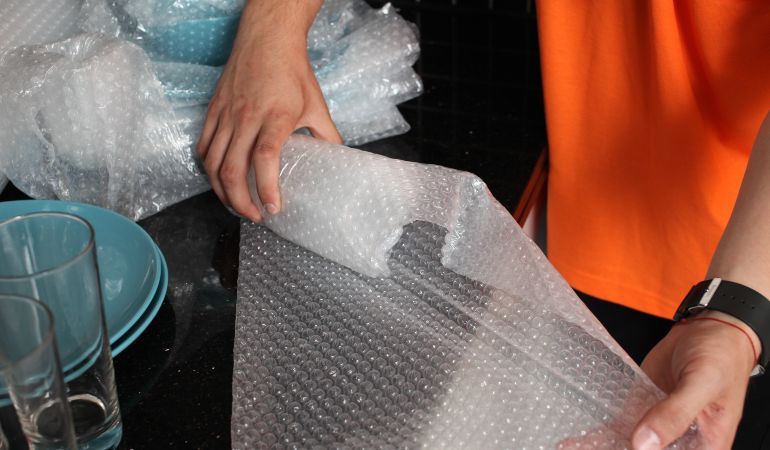
- Wrap the stem of each glass with bubble wrap first, this is the most vulnerable part.
- Stuff the bowl lightly with packing paper. If a glass does crack in transit, the paper inside will contain the damage and give you a better chance of salvaging it.
- Wrap the whole glass in a layer of packing paper and seal with duct tape.
- Use a cell pack inside the box and place each glass stem-down into its own cell. If the glass is too bulky after wrapping to fit a single cell, use two cells per glass.
- When all cells are filled, stuff as much crumpled packing paper as needed to eliminate any remaining free space.
- Seal the box with duct tape and reinforce it if it has been used before.
- Label the box clearly, both so you know where to unpack it and so whoever carries it knows to treat it with care.
The same technique applies to cocktail glasses and other stemware. For cocktail glasses, place each stem-down into its cell and, once the box is fully packed, give it a gentle shake. If you hear any movement inside, open the box, add more paper, and re-seal. There should be no sound at all when the box is properly packed.
Size of the box for packing glasses
You can pack glasses in any cardboard box, but a specialised glass box with a built-in cell divider is the better choice. It reduces friction between each glass and removes most of the risk of pieces knocking together in transit. The standard size of a moving box is 355 x 355 x 355 mm for medium-sized boxes and about 457 x 457 x 457 mm for large ones.
Be careful not to exceed 20 kg in any single moving box. Glass is heavier than it looks, and an overloaded box is likely to fail at the bottom, usually at the worst possible moment.
If you’re unsure which box type to order, tell the consultant when you book your moving boxes and packing materials delivery. They’ll confirm what’s available. If a cell divider isn’t an option, wrapping each glass individually in packing paper gives you the same protection, it just takes a little longer.
Check also:
How to Pack Items Without Stress
How to pack beer glasses and mugs
Packing beer mugs for a move is trickier than it looks. They are heavier and more solid than standard glassware, which makes them unsuitable companions for your more delicate pieces in the same box.
Pack all mugs and similarly heavy glassware in a separate box. It will be noticeably heavier than a standard glass box, so reinforce it properly and make sure whoever carries it knows what’s inside. Here’s how to do it:
- Wash and dry the mugs before packing.
You won’t have the time or energy for this after you move out, with everything else demanding your attention. - Prepare the moving box carefully.
Use a new box and reinforce it with duct tape, the extra weight of the mugs can cause a tired box to fail at the base. A cell divider isn’t essential for most mugs, since they’re thick enough to handle minor contact with each other, but use one if yours are more fragile or expensive. - Add a firm layer of packing paper to the bottom of the box and secure the edges with duct tape to keep it in place.
- Stuff each mug with paper and wrap the outside until it’s fully protected.
- Place the wrapped mugs bottom-first across the base of the box, one per cell if using a divider.
For any mugs with stems, place them stem-down. Finish this layer with a sheet of packing paper before starting the next. - Finish the top of the box with bubble wrap and packing paper until all free space is taken.
- Seal with duct tape, then give the box a gentle shake.
If anything moves inside, open it up, add more paper or bubble wrap, and re-seal until the contents are completely firm.
How to pack plates for moving
This simple technique always works and is the most basic method for wrapping a plate with paper. It’s easy to pick up and works with any plate size:
How to wrap plates in packing paper before boxing them for a move.
Prepare your work surface
Use a flat, solid surface for packing. Cover it with a large sheet of packing paper or newspaper, it should be wide enough to fully cover the plate you’re wrapping, with no edges left exposed.
Centre the plate and fold the first corner
Place the plate at the centre of the paper sheet. Gently fold one corner up and over the plate until that side is fully covered.
Stack a second plate and fold again
Place a second plate on top of the first, then fold another corner of the sheet up and over both plates. Continue folding the remaining corners one by one until the sheet is fully used.
Repeat until all four plates are wrapped
A single large sheet can wrap up to four plates this way. Each plate is cushioned by the paper between it and the next. When the sheet is fully folded, secure it with tape so it doesn’t unravel in the box.
How to pack plates in moving boxes
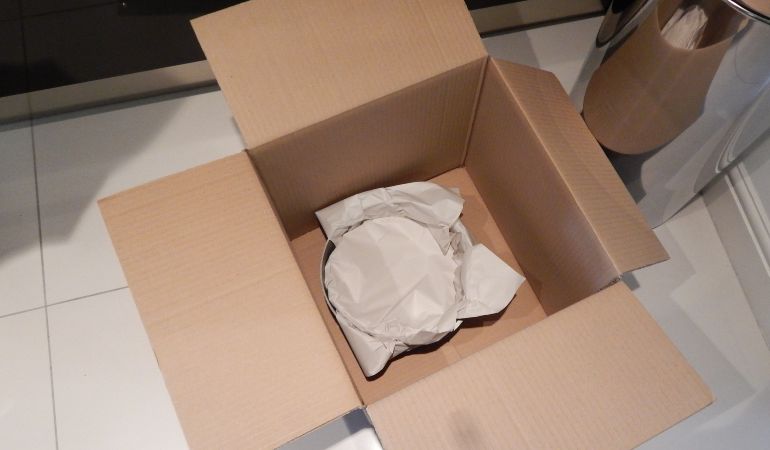
The most important rule: never place plates flat inside a cardboard box. Always put them on their sides.
- Use as much paper or other soft material at the bottom of the box and along its sides.
- Stack the wrapped plates together, each one on top of the last.
- Lay the stacks on their sides until the whole box is filled.
- Don’t leave any free space, the plates should be unable to lean or shift sideways.
- If any gaps appear, fill them with crumpled paper.
- Label the top and bottom of the box after sealing it.
- Add a “Fragile” label and set the box aside ready for loading.
How to pack plates in a dish barrel (a.k.a a Dish-Pack)
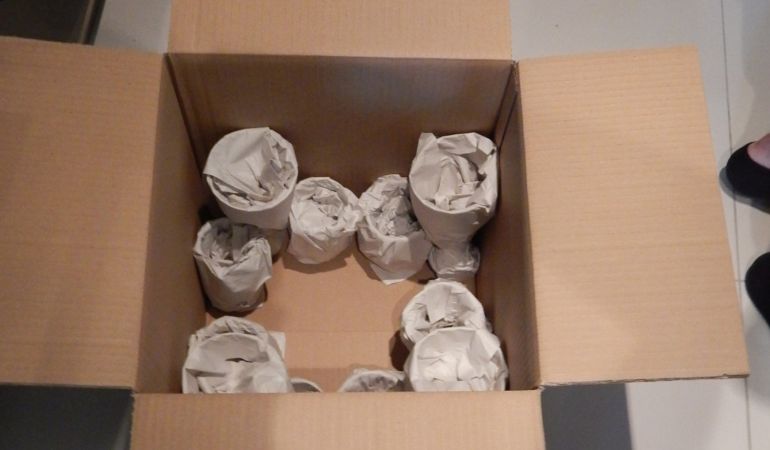
A dish barrel is one of the most efficient and easy ways to pack plates when moving out. Usually, a dish barrel has a capacity of approximately 5.6 cubic feet, which is perfectly enough to accommodate all of your kitchenware inside of it.
You can prepare your dish pack quickly by following these simple steps:
- Put heavier, solid items on the bottom of the dish box.
Things like bakeware and frying pans are perfect for the job. Anything with higher density made of metal will serve as a good foundation, ensuring the preservation of the items on top. Finish with packing paper on top of this layer. - Use the middle section of the box for kitchen appliances and thicker glassware.
Vases and beer mugs may be placed in the middle layer of the dish box. If you want to provide additional protection to the glassware, use a cell pack sized to the dish barrel. - Before putting on the top layer there should be some free space yet.
Pack this section with more cushioning and use towels, newspapers or packing paper to fill it. Items such as glassware, kitchen utensils and plastic kitchenware work well in this layer. - Prepare the dish barrel’s top layer for packing.
Make sure the third layer is well finished with enough packing paper or bubble wrap to protect what goes on top. Whatever you place in the top layer should be lighter than everything below, heavier items at the bottom, lighter items progressively towards the top. This way the whole weight is supported by the solid base, and nothing fragile at the top gets pressed down on. - Finish the top with packing paper or bubble wrap, then seal carefully.
Label the box so anyone handling it knows its contents and treats it accordingly.
How to pack plates in luggage
When moving short distances during a very small-scale house move you can use your luggage as a container for a few plates. Tenants tend to do so when changing accommodation but have one or two plates which are their property. Follow these steps to transport them safely:
- Use clothes made of soft fabric for support at the bottom of the suitcase and to fill the free space inside.
- Wrap plates in packing paper or bubble wrap.
Do it one by one so there is no direct contact between surfaces. - Don’t wrap dishes and plates too tightly, it will only make them more prone to damage.
- Put essentials on top.
Whatever you might need during the move, don’t bury it beneath the plates. Use the top layer of the luggage for your phone, keys and medicine, you need quick access to all three. - If you sense any improper weight distribution anywhere in the bag, make the necessary adjustments until you achieve the desired balance and amount of pressure on the items inside.
How to pack plates with paper – helpful tips for getting the most from the paper
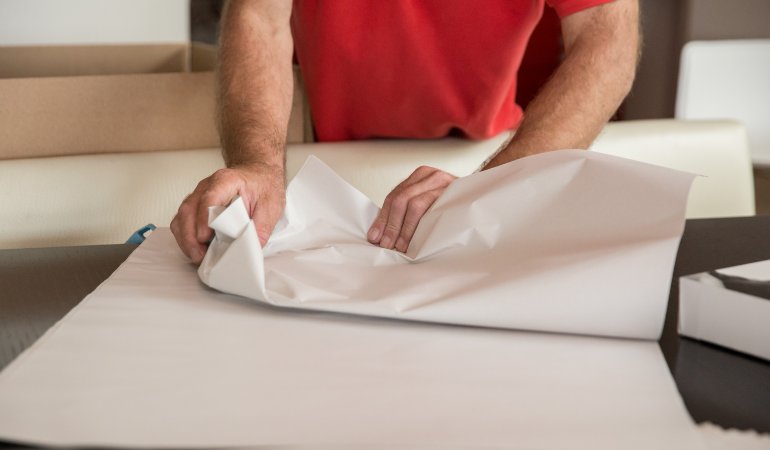
Whatever guide on how to pack plates you read, you’ll most certainly be advised to use packing paper, and there is a reason for this. When not folded but crushed into a ball, packing paper absorbs shock as well as any specialist material made for the purpose, and it’s a lot cheaper. It’s often thought of as single-use, but that’s not really true. Most people simply don’t bother keeping it, but there’s no reason you can’t reuse it.
When you finish your move and unpack successfully, don’t throw the packing paper away. You can reuse it later for wrapping, decoration, or filling gaps in a mailbox or moving box the next time you need one.
Hire professional packers & movers!
Enter your postcode to view our rates and availability in your area.
For questions about the services we offer visit our main site or you can always call us at 020 3746 0584
Helpful tips when using packing paper
- More paper provides more protection but reduces the number of items you can pack in each box.
- It’s one of the best materials for lining the bottom of moving boxes. Check the bottom is secured well with duct tape before laying the paper.
- When wrapping items, start with the paper in one corner, then fold each remaining corner over the object one by one until it’s fully covered from all sides.
- You can replace packing paper with newspaper, towels or bubble wrap, all are suitable alternatives.
- After unpacking dishes that were packed with newspaper, wash them again to remove any ink marks.
What materials to use to pack plates – The ultimate dish box moving kit
You don’t need too many things to get a dish box packed and ready for the move. Take a look at the list below, containing the most essential items, feel free to add anything else you need:
- A dish barrel (at least 1 box)
- Cell divider (when glasses are packed)
- Packing paper
- Bubble wrap
- Duck tape
- Markers for labelling the boxes
You can reinforce a cardboard box further by wrapping a thin rope around it in case the duct tape gives way. Blankets wrapped around the dish barrel add another layer of protection if you’re worried about the box during transit.
Getting the dish box packed properly and fast also affects how long it will take you to move house.
How to pack ceramic plates
Ceramic plates are deceptive. They feel solid and robust, but they won’t give you any warning before they fail. Unlike metal, ceramic doesn’t bend or dent when pressure builds, it holds its shape right up until the point it cracks completely. That’s what makes proper wrapping so important: you’ll get no visible sign that something is about to go wrong.
Once damaged, ceramics can hardly get repaired. It’s not impossible, though. There is a Japanese technique for repairing broken pottery known as Kintsugi. Rather than concealing the damage, the repair becomes part of the object’s history, and can actually add to its character and value.
Bubble wrap works well when packing ceramics. The air inside each bubble absorbs pressure from external sources, so it doesn’t transfer directly to the plate surface. Wrap each plate in bubble wrap and secure with duct tape, then stack them on their sides inside the moving box. Corelle plates, made from tempered pressed glass rather than traditional ceramic, follow the same general packing rules. They’re more resistant to top-down pressure than standard ceramic, but a dropped box or a heavy side impact is still enough to crack them, so treat them with the same care.
Book expert packers & movers for your address!
Enter your postcode to view our rates and availability in your area.
For questions about the services we offer visit our main site or you can always call us at 020 3746 0584
How to pack china dishes for moving
China dishes are found in many homes. They look fantastic on the table and bring each household a unique sense of comfort when the family gathers around it. It’s easy to pack your china dishes before moving out, follow these tips:
- Prepare the bottom of the moving box by laying lots of crumpled packing paper.
- Place larger china dishes on the bottom, it’s the sturdiest part of the box and will sustain the load from above, provided there’s enough packing material to distribute the pressure.
- Make bundles of 3–4 dishes, each packed separately, then secure each bundle with more packing material on all sides.
- Continue filling the box with bundles, progressively reducing the weight of each bundle as you move towards the top.
- Fill any gaps before finally sealing the box with duct tape.
- Wrap each large dish individually rather than grouping it into a stack.
Lauren Thomann Moving and storage expert. Writer at Life Storage
It’s tempting to do, but don’t try to put more than one dish or glass in a single piece of newspaper. For glasses, lay the paper of choice out flat, then starting at one corner, roll the glass diagonally across the sheet. Tuck ends into the top of the glass. For dishes, lay the plate or bowl in the center of the sheet, then fold in all sides. Make sure the item is completely covered and use packing tape to keep the paper in place if necessary. For huge things like vases or lamp bases, you may need multiple sheets. When packing wine glasses to move, make sure you provide enough paper around the stem so that it becomes as thick as the goblet section. The key is never to have open space inside the box where items can move into one another.
How to pack dishes for storage
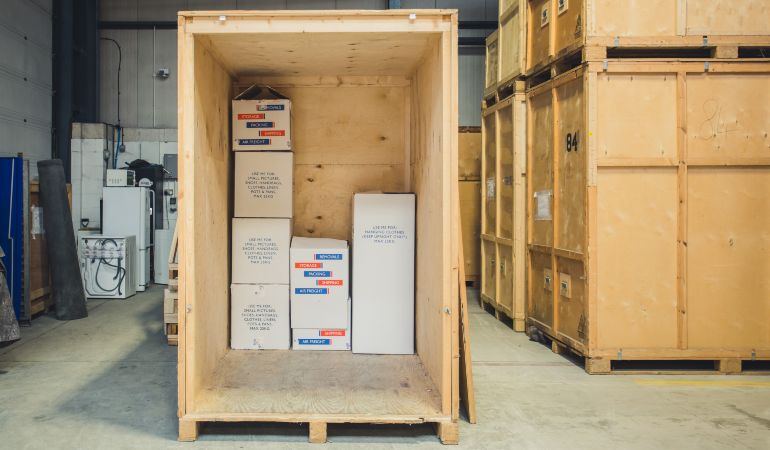
When packing dishes for storage, consider that they will remain inside a cardboard or plastic container for a long time. Humidity or cold temperatures may cause issues if the dishes are made of a material that isn’t resistant to the elements.
If you’re willing to spend a little extra on wooden crates for storage, it’s often worth it. They’re large enough to hold multiple moving boxes, and the wood provides better protection than leaving boxes on an open shelf. A professional storage provider will be able to advise you on the right solution for your situation.
Want to handle it yourself? Here are some tips that will help you store your dishes properly:
- If you use cardboard containers, add extra support to the edges and corners of the box.
Duct tape works well for this. - Make a small stack of plates and place it on its side with the plate bases pointing towards the side walls of the box.
This minimises free space and keeps the stacks stable during transportation and lifting. - Put heavier dishes at the bottom of the box.
- Provide good padding with packing paper or newspaper throughout.
- Label the boxes and add the date they went into storage.
If anything inside has an expiry date, remove it before sealing, you don’t want to discover spoiled items when you eventually open the box. - Place boxes inside the storage container strategically.
Keep boxes containing essential items close to the entrance so you don’t have to unload everything to reach them.
- If you use cardboard containers, add extra support to the edges and corners of the box.
Contact us for moving and storage solutions!
Get a Free QuoteFor questions about the services we offer visit our main site or you can always call us at 020 3746 0584
Best way to pack dishes for a long-distance move
The core principles of successfully packing dishes for a long-distance move are already described earlier in the post, where we explained how to pack plates in a dish barrel.
A common mistake we see during large-scale moves at a longer distance is that some families decide to cut costs on moving boxes. Instead of buying and properly packing a dish barrel with all their plates and glassware, they try to find cheaper, used boxes.
It’s easy to find free moving boxes, however, we do not recommend you do this for a long-distance move. Used moving boxes are often scruffy and worn out to the extent that they may threaten your items. If the bottom fails, you’ll end up with plenty of dishes or glassware broken into tiny pieces, and most certainly unable to be restored.
How to pack dishes without newspaper
If you don’t want to use newspaper when packing the dishes or any paper at all, that’s fine. There are other options that do the job just as well:
- Towels
Use any towel as long as it fits inside the box but still leaves enough space for the dishes. - Packing tape
Use it for wrapping dishes directly. It’s harder to remove than newspaper, but it works if you have nothing else to hand. - Clothing
Socks and underwear make good gap-fillers inside the moving box, stopping glasses from moving around during transportation.
How to pack dishes with bubble wrap
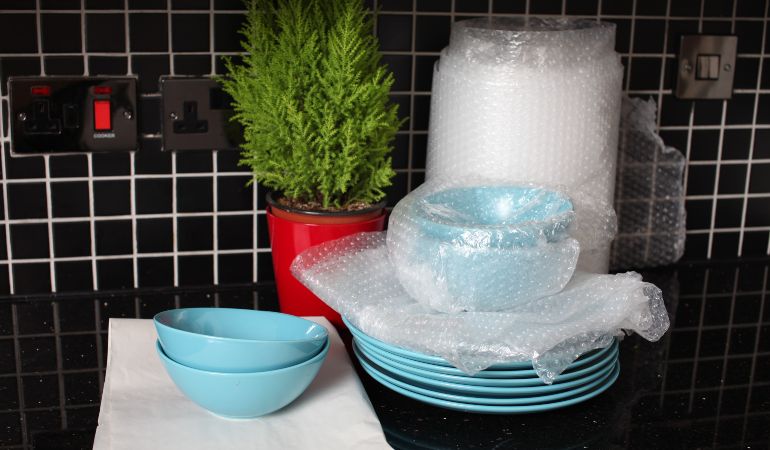
- Apply extra duct tape at the bottom of the moving box to prepare it for heavier weight.
- Wrap anything fragile with bubble wrap.
If you can’t tuck in the loose end, use duct tape to stop it unwrapping and exposing the dish. Read more tips on packing fragile items. - Place the dishes inside the moving box gently and slowly.
If you’re worried about the box being set down hard, leave a layer of bubble wrap at the bottom for extra protection. - You don’t have to fill every last bit of space as long as the wrapped items are placed correctly and the box is nearly full.
If there’s a significant gap remaining, fill it with packing paper to stop anything shifting.
How to pack pots and baking dishes
- Start by re-taping the box, this time reinforce the edges as well as the bottom, since pots and baking dishes are made of metal and are significantly heavier than standard crockery.
- Wrap any other kitchenware in packing paper and place it on the bottom of the box.
You’ll want to unload the box by removing the fragile items from the top first, then working down to the heavier, more durable things at the base. - Add an extra layer of packing paper on top of the packed kitchenware at the bottom before adding the next layer.
- Label the box as “Heavy” so anyone carrying it later knows what to expect.
Frequently Asked Questions
Can I use clothes instead of packing paper to wrap glasses?
Yes. Soft clothing, t-shirts, socks, and lightweight jumpers, works as a reasonable alternative to packing paper for wrapping glasses. Wrap each glass individually as you would with paper, making sure the fabric covers the whole glass with no exposed surface. Avoid anything with buttons, zips, or embellishments that could scratch the glass. One practical advantage: it saves on packing materials and means you arrive with fewer boxes to unpack.
How many glasses can I fit in a moving box?
It depends on the box size and how thickly you wrap each glass. A standard medium box (355 x 355 x 355 mm) with a 16-cell divider will typically hold 16 standard drinking glasses, one per cell. A large box (457 x 457 x 457 mm) can hold more, but remember the 20 kg weight limit, glass is heavier than it looks, and an overloaded box is likely to fail at the base. When in doubt, use a smaller box and keep it under the weight limit rather than cramming more in.
Should glasses be packed upright or on their side?
Both work, provided each glass is individually wrapped and in its own cell. Upright is generally the safer default for standard drinking glasses, as it distributes the glass’s weight most naturally. On their side is fine for shorter, sturdier glasses where the box height isn’t tall enough to stand them upright. What you should never do is pack glasses flat on their bases in a stack, this puts the full weight of one glass onto the rim of the next and is the most common cause of rim chips during a move.
How do I pack a glass table top for moving?
A glass table top needs completely different treatment from glassware. Stand it upright on its long edge, never lay it flat, as flat glass is far more likely to crack under its own weight or from any flex in the box. Wrap the edges with several layers of bubble wrap and secure with tape, then wrap the faces in moving blankets or thick packing paper. Slide it into a purpose-sized flat cardboard sheet or mirror box if one is available, and pad any remaining space firmly. Label the package clearly as fragile and always carry it vertically.
Check also:
Conclusion
Packing glasses and dishes well comes down to a few consistent habits: wrap everything individually, never leave free space in a box, and keep weight under 20 kg per box. Whether you’re dealing with everyday drinking glasses, fine stemware or a full set of china, the same principles apply. Take the time to do it properly before the move and you’ll spend far less time dealing with damage afterwards.
If you’d rather leave the packing to someone else, a professional packing and removals service can handle everything from the individual wrapping of each glass to the safe loading of every box. It’s worth considering, particularly for a larger move or anything involving genuinely irreplaceable pieces.